selenium 函式庫 ( 模組 ) 是使用 Python 進行網路爬蟲時,必備的函式庫之一,透過 selenium 可以模擬出使用者在瀏覽器的所有操作行為 ( 點擊按鈕、輸入帳號密碼、捲動捲軸…等 ),因此除了爬蟲的應用,也常作為「自動化測試」使用的工具,在網站開發完成後,透過自動化的腳本測試所有功能是否正常,這篇教學將會介紹 selenium 函式庫的常見用法,更多用法可前往閱讀 selenium 官方文件。
執行 selenium 會啟動 chromedriver,所以所以請使用本機環境 ( 參考:使用 Python 虛擬環境 ) 或使用 Anaconda Jupyter 進行實作 ( 參考:使用 Anaconda ) 。
快速導覽:
- 安裝 selenium 函式庫
- 什麼是 Selenium WebDriver
- 下載 WebDriver
- import selenium
- 使用 WebDriver 開啟第一個網頁
- 取得網頁元素
- 操作網頁元素
- 取得網頁元素的內容
- 搭配 JavaScript,發揮最大效益
- 參考資料
安裝 selenium 模組
在本機環境輸入下列指令,就能安裝 selenium 函式庫 ( 依據每個人的作業環境不同,可使用 pip 或 pip3 或 pipenv,Anaconda Jupyter 的安裝指令為 !pip )。
pip install selenium
什麼是 Selenium WebDriver
WebDriver 是用來執行並操作瀏覽器的 API 介面,每一個瀏覽器都會有各自對應的驅動程式 ( driver ),Selenium 會透過 WebDriver 來直接對瀏覽器進行操作,將所支援的瀏覽器進行自動化作業,就如同真的使用者在操作。
下載 WebDriver
不同的瀏覽器會對應不同的 driver,以下提供幾種常見的 driver ( 本篇範例使用的是 Chrome ):
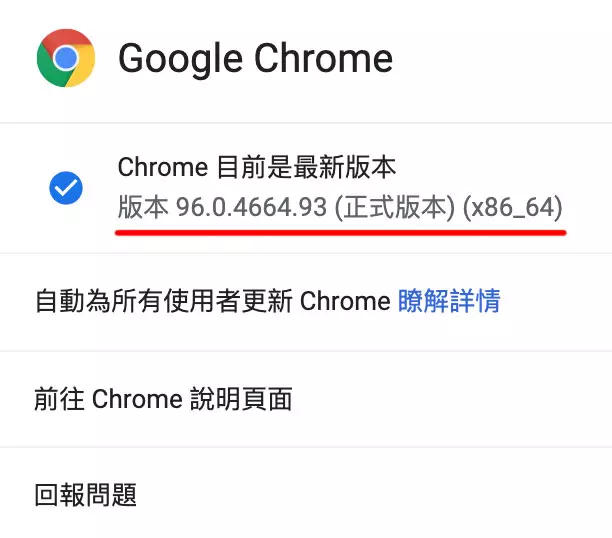
下載 Chrome driver 時請,必須下載對應的 Chrome 的版本,點擊右上角選單「說明 > 關於 Google Chrome」,可以查看版本。
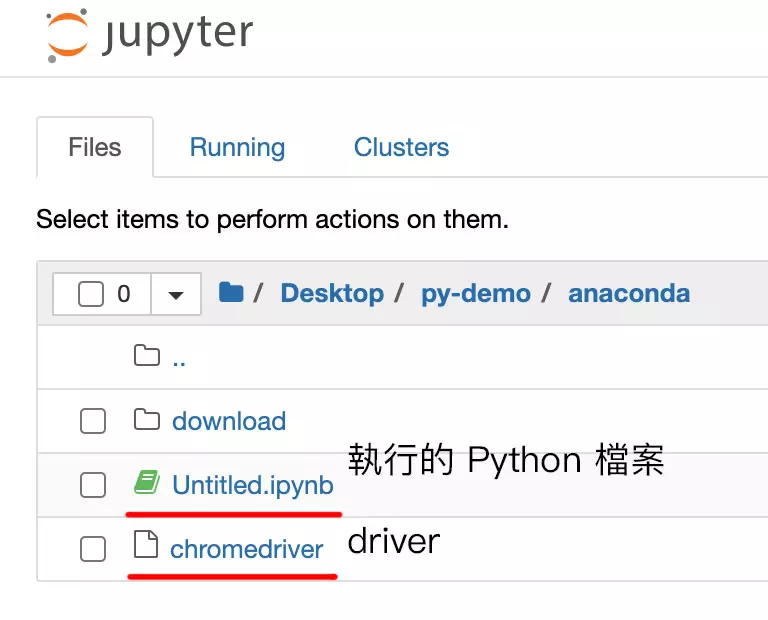
下載後將 driver 與執行的 Python 檔案放在同一個目錄下,就比較不需要煩惱執行時路徑的問題。
import selenium
要使用 requests 必須先 import selenium 模組,啟用 webdriver 的功能。
from selenium import webdriver
使用 WebDriver 開啟第一個網頁
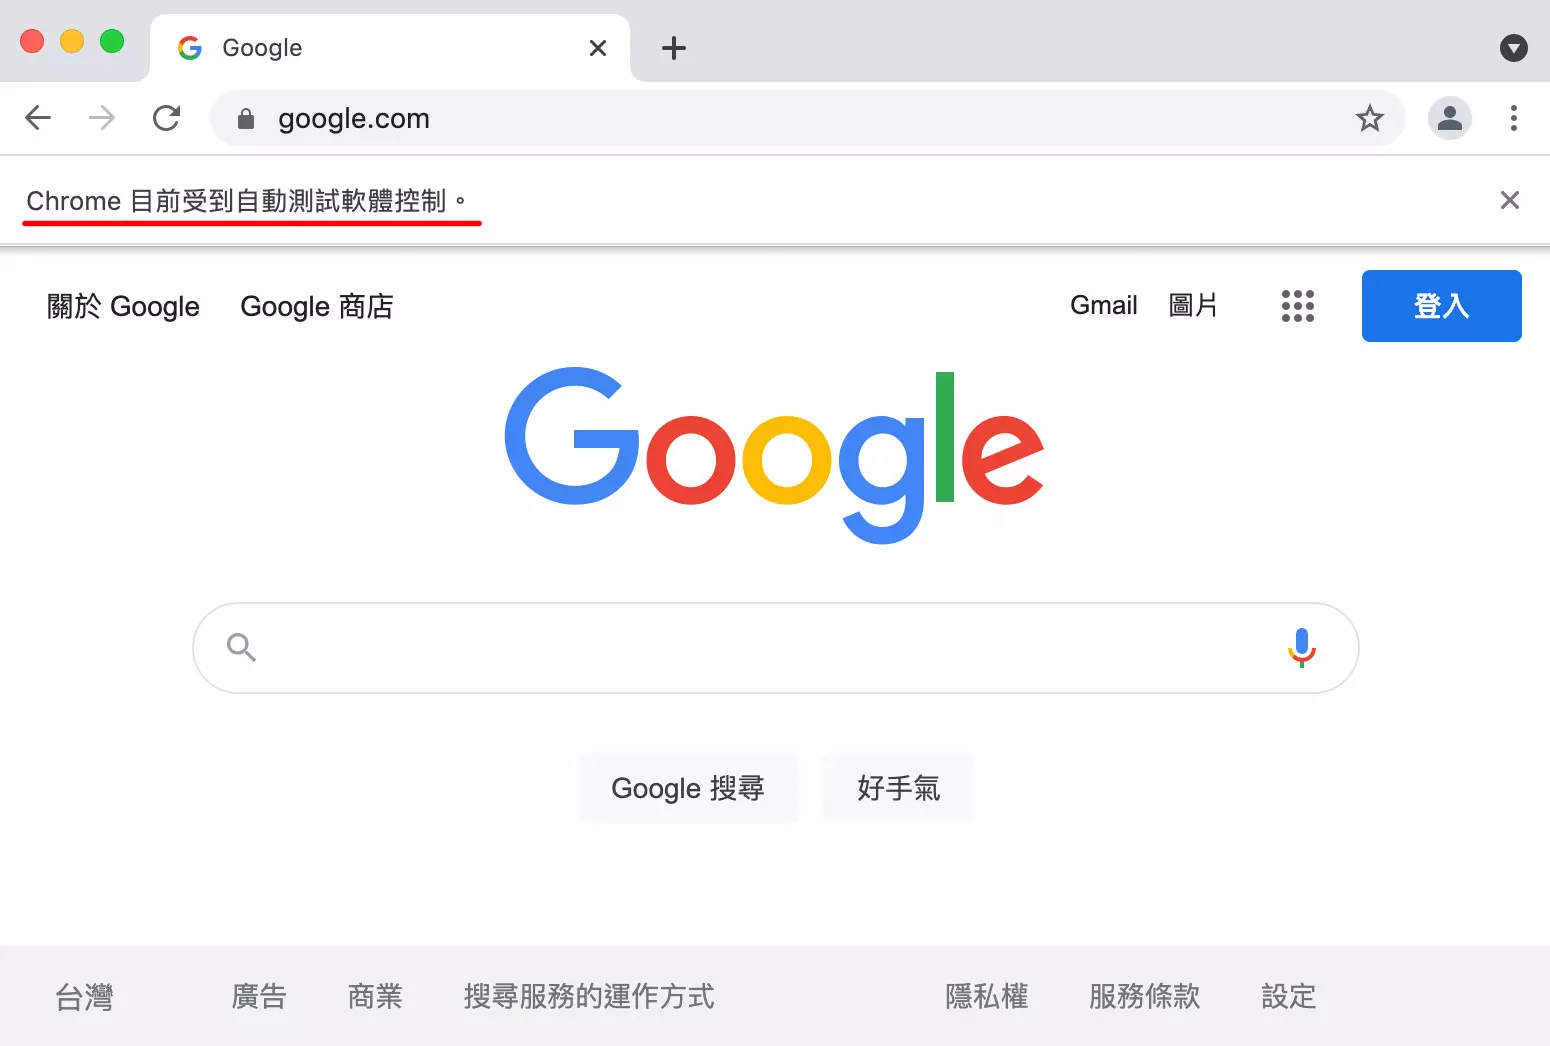
selenium 與 driver 都安裝與準備好之後,下方的程式碼執行後,會打開一個新的 Chrome 視窗,裡面出現指定的 Google 網頁,此時這個新的 Chrome 視窗會標明「受到自動測試軟體控制」,表示程式正在控制相關的操作。
webdriver.Chrome(路徑) 使用相對路徑 chromedriver 和執行的程式位在同一層。
from selenium import webdriver
driver = webdriver.Chrome('./chromedriver')    # 指向 chromedriver 的位置
driver.get('https://www.google.com')           # 打開瀏覽器,開啟網頁
取得網頁元素
要模擬真人操作網頁的第一步,就是要知道觸碰了哪些網頁元素,首先載入 selenium 的 By 模組,接著就能使用 find_element() 搭配參數設定,取得指定的網頁元素,下方列出 find_element() 常用參數設定 ( 如果將方法的 element 改為 elements,會以串列方式回傳找到的元素 ):
新版本 selenium 取得元素的方法有所變更,本文也一併更新,詳細的方法參考:selenium.webdriver.remote.webelement
| 參數 | 說明 |
|---|---|
| By.ID, id | 透過 id,尋找第一個相符的網頁元素。 |
| By.CLASS_NAME, class | 透過 class,尋找第一個相符的網頁元素。 |
| By.CSS_SELECTOR, css selector | 透過 css 選擇器,尋找第一個相符的網頁元素。 |
| By.NAME, name | 透過 name 屬性,尋找第一個相符的網頁元素。 |
| By.TAG_NAME, tag | 透過 HTML tag,尋找第一個相符的網頁元素。 |
| By.LINK_TEXT, text | 透過超連結的文字,尋找第一個相符的網頁元素 |
| By.PARTIAL_LINK_TEXT, text | 透過超連結的部分文字,尋找第一個相符的網頁元素。 |
| By.XPATH, xpath | 透過 xpath 的方式,尋找第一個相符的網頁元素。 |
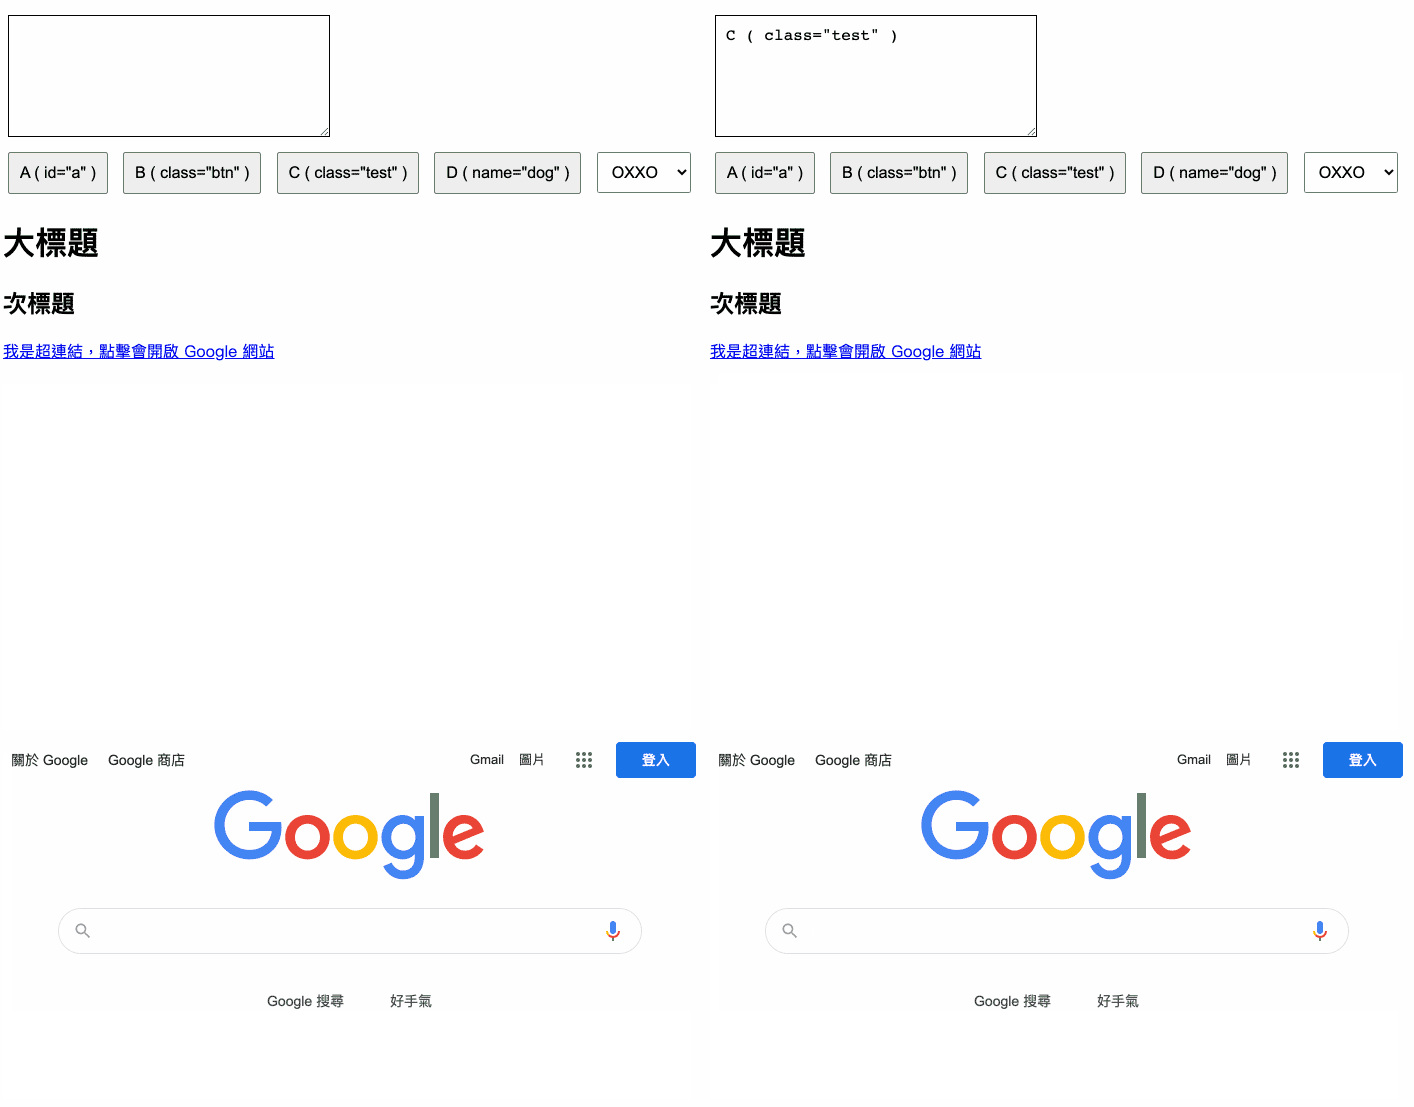
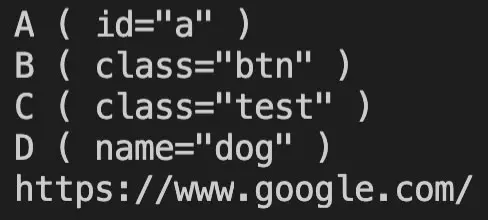
下方的程式會用 selenium 開啟範例網址 ( 網址連結 ),開啟後會用上述的方法,選取特定的網頁元素,接著套用點擊的方法,依序點擊各個按鈕,最後會連續打開兩次 Google 網站。
範例網址已經有做過點擊的處理,點擊按鈕或下拉選單切換時,上方空格會顯示對應的文字。
from selenium import webdriver
from selenium.webdriver.common.by import By
from selenium.webdriver.support.select import Select   # 使用 Select 對應下拉選單
import time

driver = webdriver.Chrome('./chromedriver')
driver.get('https://example.oxxostudio.tw/python/selenium/demo.html')  # 開啟範例網址
a = driver.find_element(By.ID, 'a')                # 取得 id 為 a 的網頁元素 ( 按鈕 A )
b = driver.find_element(By.CLASS_NAME, 'btn')      # 取得 class 為 btn 的網頁元素 ( 按鈕 B )
c = driver.find_element(By.CSS_SELECTOR, '.test')  # 取得 class 為 test 的網頁元素 ( 按鈕 C )
d = driver.find_element(By.NAME, 'dog')            # 取得屬性 name 為 dog 的網頁元素 ( 按鈕 D )
h1 = driver.find_element(By.TAG_NAME, 'h1')        # 取得 tag h1 的網頁元素
link1 = driver.find_element(By.LINK_TEXT, '我是超連結,點擊會開啟 Google 網站')  # 取得指定超連結文字的網頁元素
link2 = driver.find_element(By.PARTIAL_LINK_TEXT, 'Google') # 取得超連結文字包含 Google 的網頁元素
select = Select(driver.find_element(By.XPATH, '/html/body/select'))   # 取得 html > body > select 這個網頁元素

a.click()        # 點擊 a
print(a.text)    # 印出 a 元素的內容
time.sleep(0.5)
b.click()        # 點擊 b
print(b.text)    # 印出 b 元素的內容
time.sleep(0.5)
c.click()        # 點擊 c
print(c.text)    # 印出 c 元素的內容
time.sleep(0.5)
d.click()        # 點擊 d
print(d.text)    # 印出 d 元素的內容
time.sleep(0.5)
select.select_by_index(2)  # 下拉選單選擇第三項 ( 第一項為 0 )
time.sleep(0.5)
h1.click()       # 點擊 h1
time.sleep(0.5)
link1.click()    # 點擊 link1
time.sleep(0.5)
link2.click()    # 點擊 link2
print(link2.get_attribute('href'))   # 印出 link2 元素的 href 屬性
操作網頁元素
使用 Selenium 函式庫操作網頁元素下列幾種方法:
| 方法 | ActionChains 參數 | 說明 |
|---|---|---|
| click() | element | 按下滑鼠左鍵。 |
| click_and_hold() | element | 滑鼠左鍵按著不放。 |
| double_click() | element | 連續按兩下滑鼠左鍵。 |
| context_click() | element | 按下滑鼠右鍵 ( 需搭配指定元素定位 )。 |
| drag_and_drop() | source, target | 點擊 source 元素後,移動到 target 元素放開。 |
| drag_and_drop_by_offset() | source, x, y | 點擊 source 元素後,移動到指定的座標位置放開。 |
| move_by_offset() | x, y | 移動滑鼠座標到指定位置。 |
| move_to_element() | element | 移動滑鼠到某個元素上。 |
| move_to_element_with_offset() | element, x, y | 移動滑鼠到某個元素的相對座標位置。 |
| release() | element | 放開滑鼠。 |
| send_keys() | values | 送出某個鍵盤按鍵值。 |
| send_keys_to_element() | element, values | 向某個元素發送鍵盤按鍵值。 |
| key_down() | value | 按著鍵盤某個鍵。 |
| key_up() | value | 放開鍵盤某個鍵。 |
| reset_actions() | 清除儲存的動作 ( 實測沒有作用,查訊後是 Bug )。 | |
| pause() | seconds | 暫停動作。 |
| perform() | 執行儲存的動作。 |
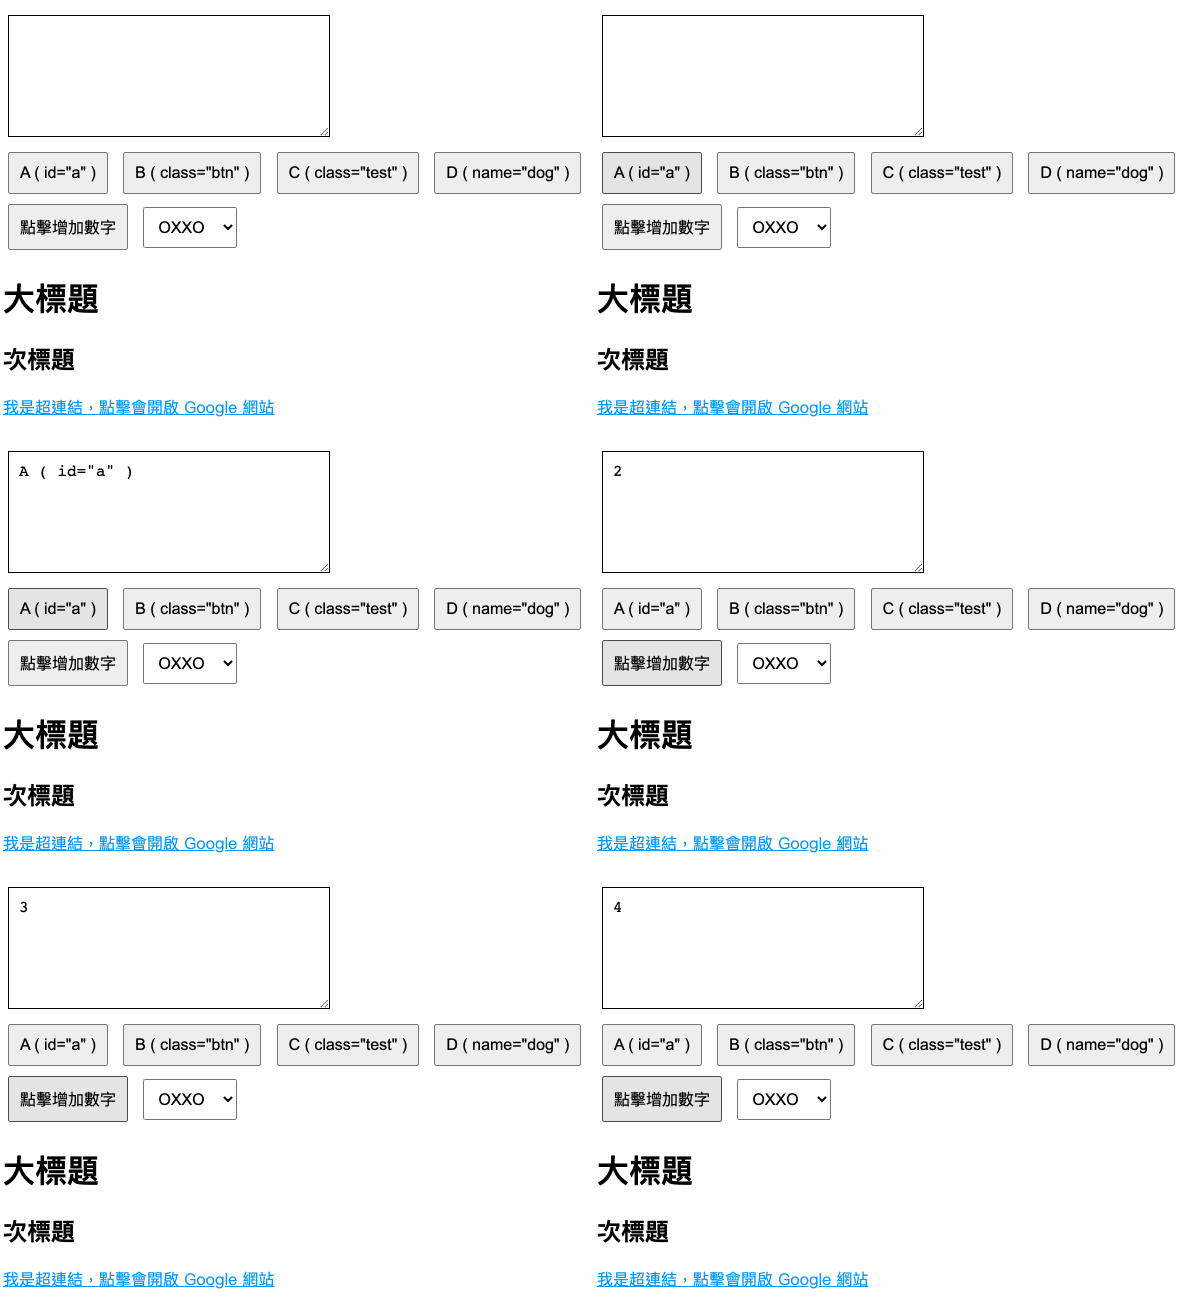
要使用這些方法的方式有兩種,第一種就是「針對指定元素呼叫方法」,例如上方例子的 click() 方法,只要針對指定的元素,呼叫指定的方法,就會執行對應的動作,第二種是使用「ActionChains」,將所有需要執行的方法串成「鏈」,全部完成後執行 perform() 執行所有的過程。
下方的程式使用「針對指定元素呼叫方法」。
from selenium import webdriver
from selenium.webdriver.common.by import By
from time import sleep

driver = webdriver.Chrome('./chromedriver')
driver.get('https://example.oxxostudio.tw/python/selenium/demo.html')
a = driver.find_element(By.ID, 'a')
add = driver.find_element(By.ID, 'add')
a.click()     # 點擊按鈕 A,出現 a 文字
sleep(1)
add.click()   # 點擊 add 按鈕,出現 數字 1
add.click()   # 點擊 add 按鈕,出現 數字 2
sleep(1)
add.click()   # 點擊 add 按鈕,出現 數字 3
sleep(1)
add.click()   # 點擊 add 按鈕,出現 數字 4
下方的程式使用「ActionChains」的方式,結果與上述的執行結果相同。
from selenium import webdriver
from selenium.webdriver.common.by import By
from selenium.webdriver.common.action_chains import ActionChains

driver = webdriver.Chrome('./chromedriver')
driver.get('https://example.oxxostudio.tw/python/selenium/demo.html')
a = driver.find_element(By.ID, 'a')
add = driver.find_element(By.ID, 'add')
actions = ActionChains(driver)   # 使用 ActionChains 的方式
actions.click(a).pause(1)        # 點擊按鈕 A,出現 a 文字後,暫停一秒
actions.double_click(add).pause(1).click(add).pause(1).click(add)
# 連點 add 按鈕,等待一秒後再次點擊,等待一秒後再次點擊
actions.perform()  # 執行儲存的動作
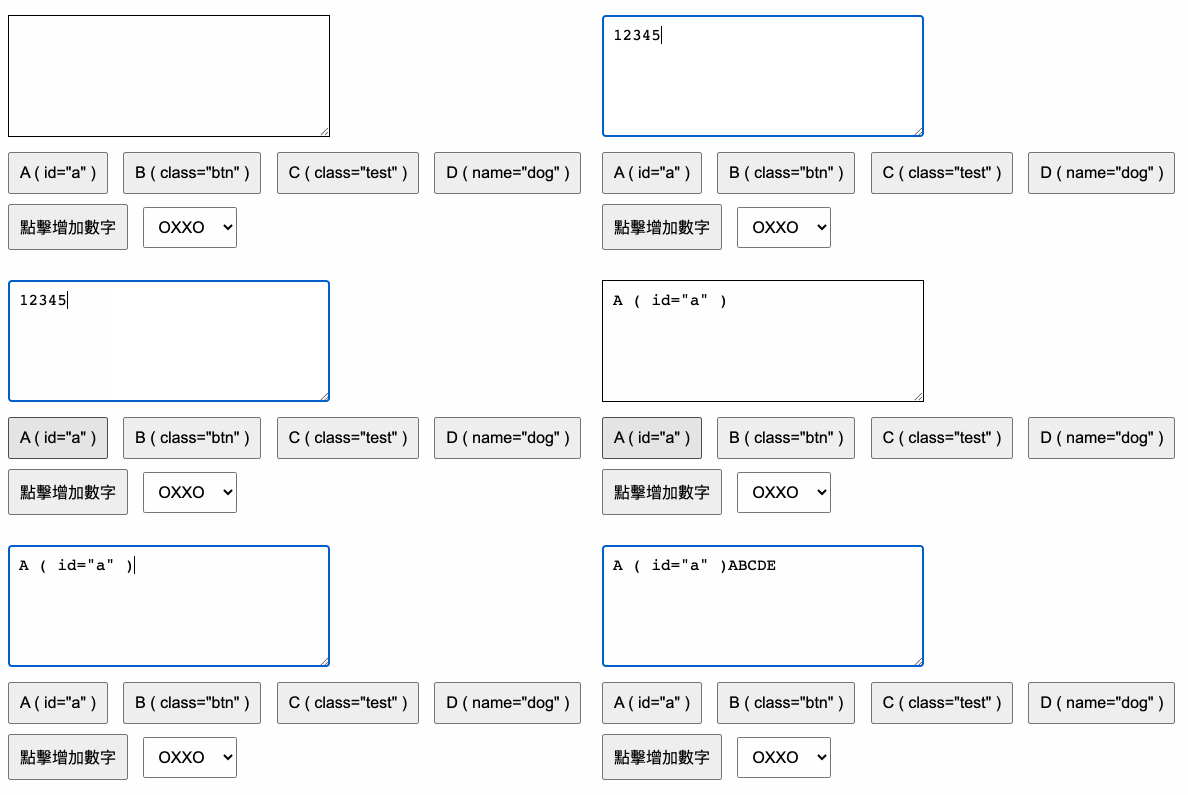
雖然「針對指定元素呼叫方法」看起來滿直覺,但相對來說能使用的方法有限 ( 只能使用 click、send_keys…等兩三種 ),使用「ActionChains」才能完整發揮所有的方法,下方的程式碼執行後,會自動在輸入框內輸入指定的文字。
from selenium import webdriver
from selenium.webdriver.common.by import By
from selenium.webdriver.common.action_chains import ActionChains

driver = webdriver.Chrome('./chromedriver')
driver.get('https://example.oxxostudio.tw/python/selenium/demo.html')
a = driver.find_element(By.ID, 'a')
show = driver.find_element(By.ID, 'show')
actions = ActionChains(driver)
actions.click(show).send_keys(['1','2','3','4','5'])    # 輸入 1~5 的鍵盤值 ( 必須是字串 )
actions.pause(1)    # 等待一秒
actions.click(a)    # 點擊按鈕 A
actions.pause(1)    # 等待一秒
actions.send_keys_to_element(show, ['A','B','C','D','E'])   # # 輸入 A~E 的鍵盤值
actions.perform()   # 送出動作
取得網頁元素的內容
Selenium 不僅能模擬真人去控制網頁元素,也可以取得網頁元素的相關內容,甚至進一步執行網頁截圖並儲存的功能,常用的內容如下:
| 內容 | 說明 |
|---|---|
| text | 元素的內容文字。 |
| get_attribute | 元素的某個 HTML 屬性值。 |
| id | 元素的 id。 |
| tag_name | 元素的 tag 名稱。 |
| size | 元素的長寬尺寸。 |
| screenshot | 將某個元素截圖並儲存為 png。 |
| is_displayed() | 元素是否顯示在網頁上。 |
| is_enabled() | 元素是否可用。 |
| is_selected() | 元素是否被選取。 |
| parent | 元素的父元素。 |
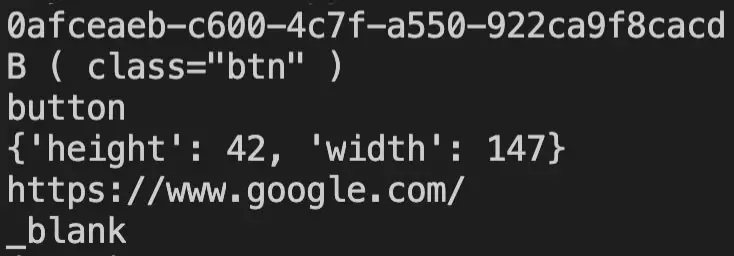
下方的程式碼執行後,會取得元素的 id、內容文字、tag 名稱、尺寸和屬性值,最後會將整張網頁截圖為 test.png。
from selenium import webdriver
from selenium.webdriver.common.by import By

driver = webdriver.Chrome('./chromedriver')
driver.get('https://example.oxxostudio.tw/python/selenium/demo.html')
body = driver.find_element(By.TAG_NAME, 'body')
a = driver.find_element(By.ID, 'a')
b = driver.find_element(By.CLASS_NAME, 'btn')
c = driver.find_element(By.CSS_SELECTOR, '.test')
d = driver.find_element(By.NAME, 'dog')
link1 = driver.find_element(By.LINK_TEXT, '我是超連結,點擊會開啟 Google 網站')
link2 = driver.find_element(By.PARTIAL_LINK_TEXT, 'Google')

print(a.id)
print(b.text)
print(c.tag_name)
print(d.size)
print(link1.get_attribute('href'))
print(link2.get_attribute('target'))
body.screenshot('./test.png')
搭配 JavaScript,發揮最大效益
Selenium 除了內建的方法,也可以搭網頁的 JavaScript,發揮網頁控制的最大效益,下方的程式碼執行後,會先上下滾動網頁捲軸,接著彈出提示視窗,兩秒後再關閉提示視窗。
from selenium import webdriver
from selenium.webdriver.common.by import By
from selenium.webdriver.common.alert import Alert
from time import sleep

driver = webdriver.Chrome('./chromedriver')
driver.get('https://www.selenium.dev/selenium/docs/api/py/webdriver_remote/selenium.webdriver.remote.webelement.html')

sleep(1)
driver.execute_script('window.scrollTo(0, 500)')   # 捲動到 500px 位置
sleep(1)
driver.execute_script('window.scrollTo(0, 2500)')  # 捲動到 2500px 位置
sleep(1)
driver.execute_script('window.scrollTo(0, 0)')     # 捲動到 0px 位置

h1 = driver.find_element(By.TAG_NAME, 'h1')
h3 = driver.find_element(By.TAG_NAME, 'h3')
script = '''
  let h1 = arguments[0];
  let h3 = arguments[1];
  alert(h1, h3)
'''
driver.execute_script(script, h1, h3)   # 執行 JavaScript,印出元素
sleep(2)
Alert(driver).accept()    # 點擊提示視窗的確認按鈕,關閉提示視窗
參考資料
Selenium 函式庫不僅能應用於自動化測試,對於爬蟲的應用而言也是必備的函式庫,下方列出 Selenium 的官方文件,如果要了解更詳細的資訊可以前往閱讀:
- Selenium 官方網站:API 文件
- 取得網頁元素:selenium.webdriver.remote.webelement
- 操作網頁元素:selenium.webdriver.common.action_chains
- 控制下拉選單:selenium.webdriver.support.select
- 檢查網頁元素:selenium.webdriver.support.expected_conditions
- 等待:selenium.webdriver.support.wait
Source : https://steam.oxxostudio.tw/category/python/spider/selenium.html
