This Content Is Only For Subscribers
Whether you need to authenticate your users for PPP or any other Mikrotik service, you can do that either through the internal database or using the external RADIUS server. On the other hand, your corporate users want to use one login for all network services.
Additionally, you can connect any Mikrotik device with your Windows AD.
Let’s make the magic!
The scenario
Let’s assume that we have one Mikrotik router that will serve as your company’s VPN concentrator. This means that all company users will establish their VPN sessions through that device. That may be your main router or you can deploy another Mikrotik device in the DMZ zone.
You want to use the same username and password for the VPN as your corporate users use to log on to their computers. This is also known as Single Sign-On or SSO.
Starting with Windows 2000, Microsoft replaced their internal user database with the structure named Active Directory or AD for short. In its essence, Active Directory is the LDAP system. And yes, LDAP is the open standard for directories. However, Mikrotik devices can’t connect directly to the LDAP server.
Although your Mikrotik device doesn’t use the LDAP protocol, it is perfectly capable of using another open standard – RADIUS. The Remote Authentication Dial-In User Service protocol is described in RFC 2865.
The answer for this scenario is very simple – use the Microsoft implementation of RADIUS server and integrate your Mikrotik devices with your domain. This service exists in every Windows Server (from 2008 R2 onward) and its named Network Policy Server or NPS.
Even better, it exists even in ye olde Windows 2000 and 2003 Servers and it’s named IAS. However, those platforms are obsolete and we will not take them into further consideration.
The recipe
In an essence, we need:
- At least one working AD server (a.k.a. the domain controller)
- Your users already can log on to this domain and work regularly with other network services, like file servers
- At least one server in that domain must have a NPS role
- Your Mikrotik device must be properly configured for other network roles and accessible from your local network and the Internet
Please, note the following information:
- all LAN IP addresses of all devices you will use
- the short domain name (like Contoso)
- all user groups in that domain that will use this service
- check your password policies for communication between devices
When all those steps are fulfilled, we can continue with this process.
Install the NPS role on the server
The first step is to install the NPS role on one of your servers. You may have more than one NPS server in your network. Later, you will see that one Mikrotik device may use more than one RADIUS server. In my scenario, I will use one Mikrotik device and one NPS server.
This process it the same regardless of the version of Windows Server. I found those screenshots in my archive and I luckily made them 5-6 years ago when I configured NPS for the first time. When I upgraded that server to 2012R2, I used them to repeat this process smoothly.
Open the Server Manager GUI on your server and add new role – Network Policy and Access Services.
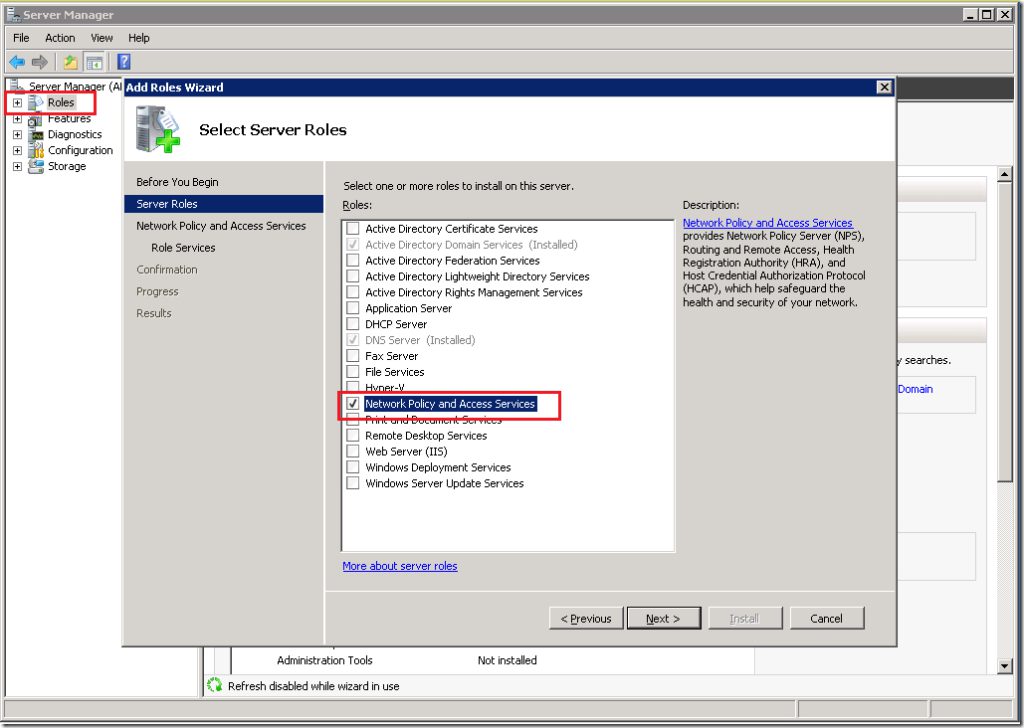
You need to select only the Network Policy Server role. In Windows Server 2012R2, you will not see the Routing and Remote Access Services option here. Don’t worry, you don’t need it at all.

Finish the installation process.

It will take a while, so grab a coffee and prepare for the next step.
Configuration of the NPS service
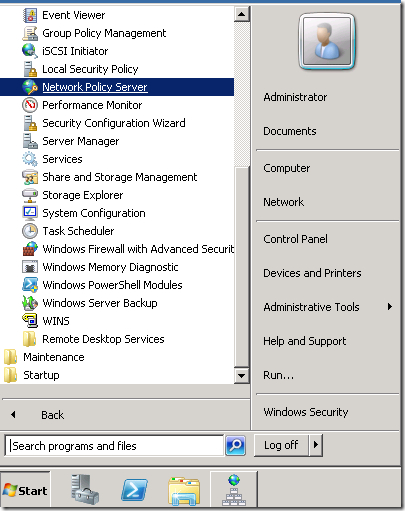
Open the Network Policy server console from the Administrative Tools.
When the console opens, you can start to configure it. Choose RADIUS server for Dial-Up or VPN Connections from the dropdown menu.
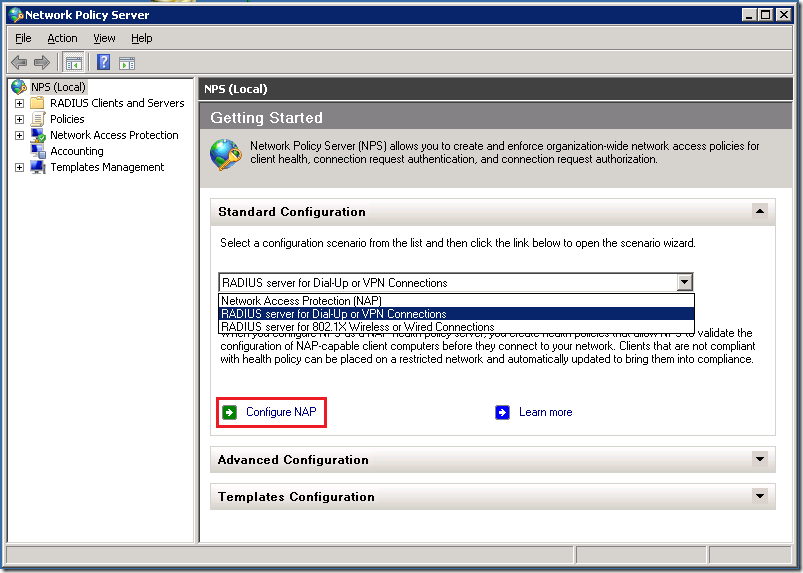
Then click on the button named Configure NAP. We are just starting the configuration process.
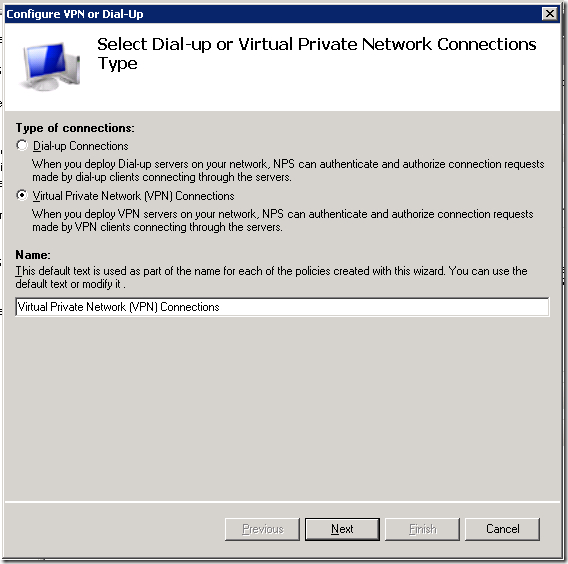
The next step is to name it and choose the type. We need the policy for VPN connections.
Now, we need to add all RADIUS clients that will use this policy. Yes, you may have more than one client related to the same policy.
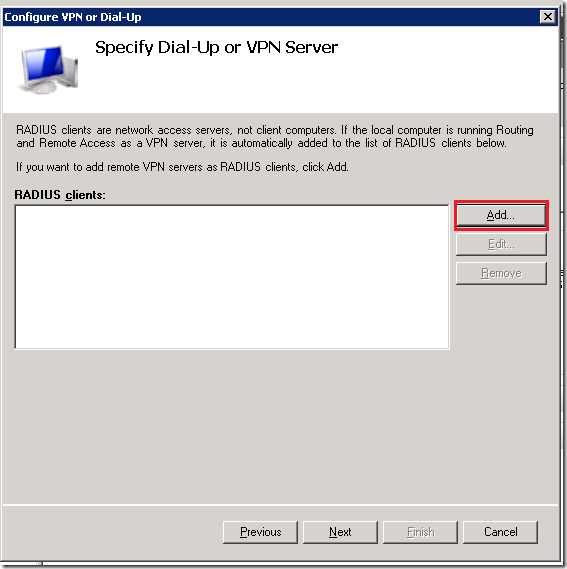
Click on the button [ Add… ] and the new dialog will pop up. You need to define:
- a friendly name for that device (like Mikrotik router)
- specify its IP address (or DNS name)
- enter the RADIUS secret – a password that will be used later in communication
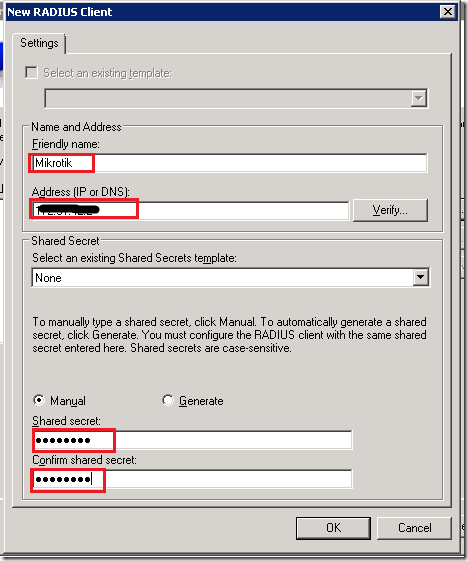
This RADIUS secret is important and therefore write it down. You must enter it correctly later on your Mikrotik device. As you already concluded, you may use the different secrets for different clients.
Repeat this process for all clients you want to configure here. When you finish, just continue to the next step.

We should choose the authentication method.
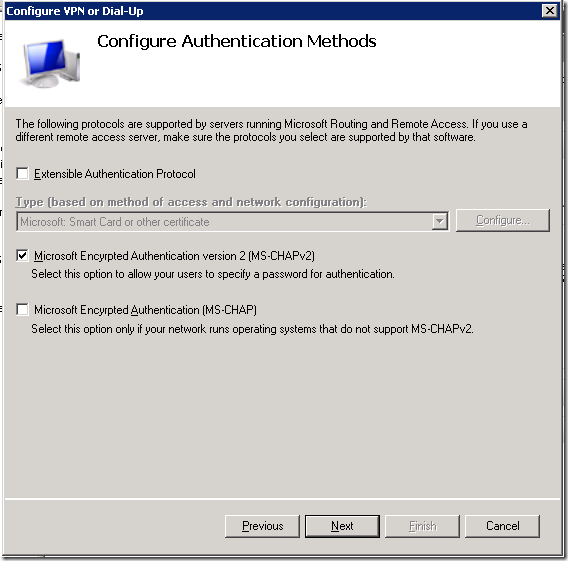
I left this on MS-CHAPv2 protocol. It is not important here, as it’s related to Microsoft Windows based services.
The next step is to add users that will be processed with this policy. This dialog is very similar to that related to the network clients. This is a very important step.

Again, click on the button [ Add… ] and the new dialog will pop up. This is the standard dialog to select users or groups that you can see anywhere in Windows.
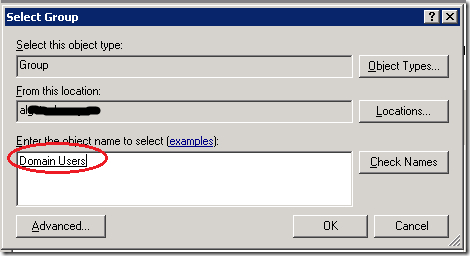
Choose all the groups you want to include. As this policy will cover all users in the domain and all users are always the part of group named Domain Users, I added only this one group here. Again, when you finish adding all necessary group, go to the next step – the IP filters.
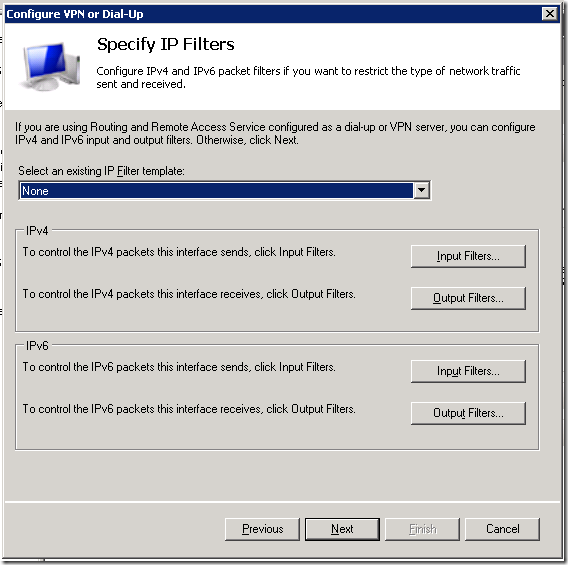
Just leave it on None and continue.
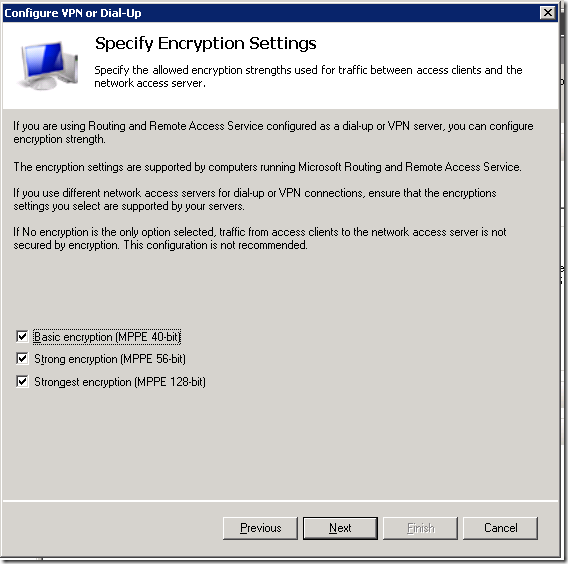
Those settings are also not important for this policy as they are only Microsoft related. Just continue further.
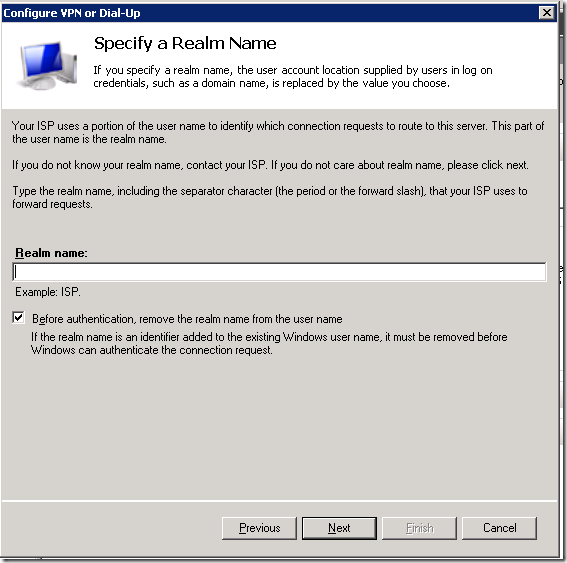
You don’t need to use the REALM name so leave it blank. In case you want to use it, you need to specify it later in Mikrotik.

And that’s it. We have our new policy that will process all VPN logins from our Mikrotik router.
Check your new policy
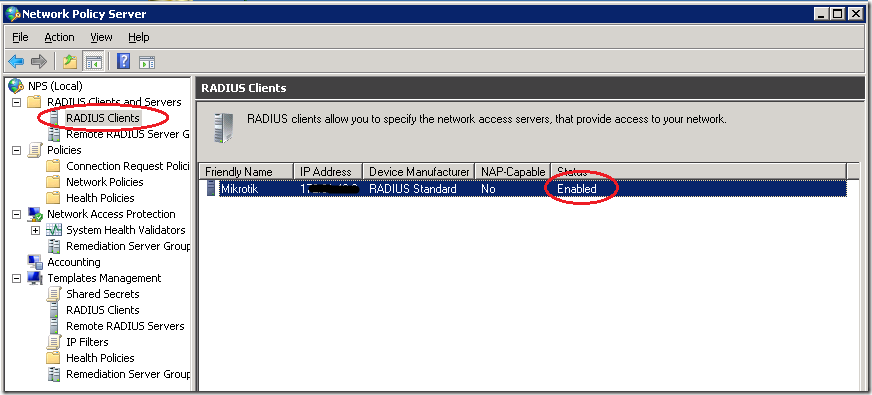
Before we switch on the Mikrotik side, we will check our setup on the NPS side. This is also a good way to do the troubleshooting steps.
The first step is the RADIUS Clients list – your device must be enlisted and enabled
The second step is to check the Connection Request Policies – the VPN policy must be enabled.

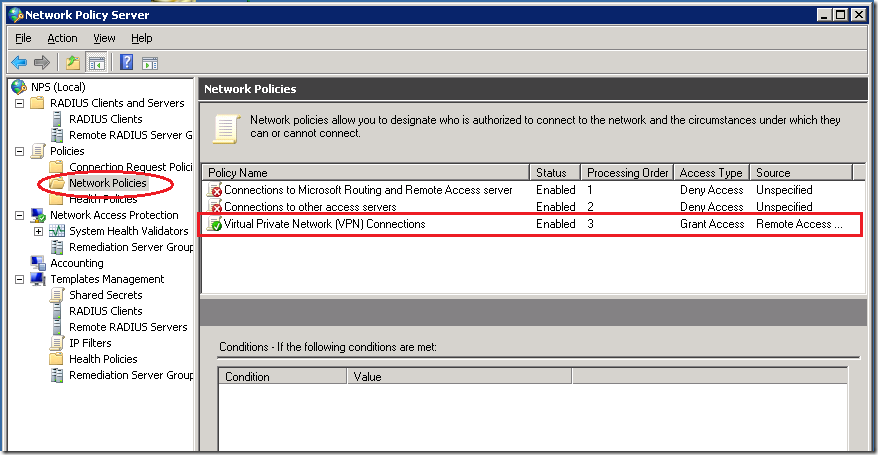
The third step is to check the Network policies – the policy for VPN connections must be enabled
Now, we are ready to configure our Mikrotik device.
Configuring our Mikrotik device as the RADIUS client
We know that our NPS server works and we can configure the client side. In this scenario, I will enable the RADIUS authentication for PPP services. I used WinBox here, but you can do the same using the terminal.
Preparing the PPP service for RADIUS
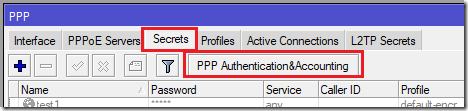
I opened the PPP options in WinBox and then chose the tab named Secrets. On this tab, I clicked on the button named PPP Authentication & Accounting.
The new dialog opened and I checked the option named Use Radius
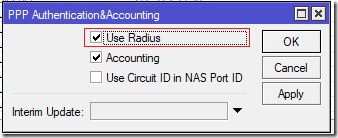
I closed this dialog and the PPP settings. Now, all my PPP services may use the RADIUS service. Keep in mind that Mikrotik can simultaneously use both the local user database and the remote RADIUS server for the user authentication.
Configuring the RADIUS client
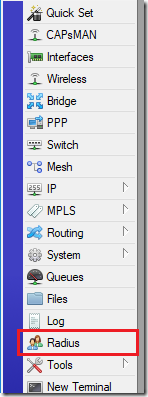
The RADIUS client is hidden behind the command named RADIUS in the main menu of the WinBox GUI.
The new window will open and here we can see all configured RADIUS clients. As I already mentioned, we can use more than one RADIUS server with the same Mikrotik device.
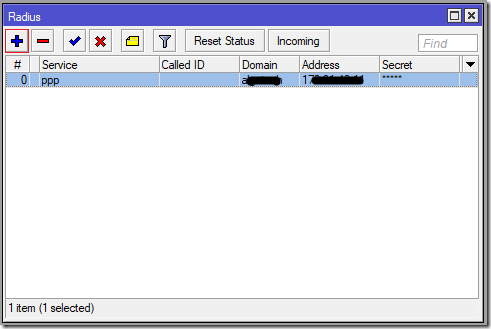
If you need to define the new RADIUS server connection, click on the button [ + ] or just double-click on the existing definition to edit it. Now we can configure our connection.
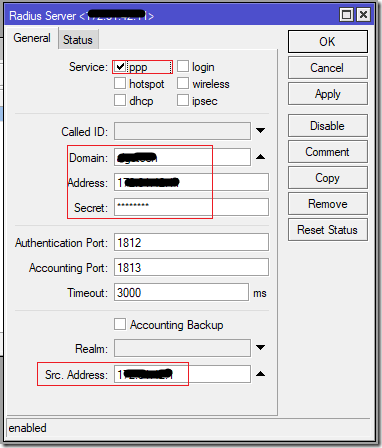
We need to specify:
- the service (ppp in this scenario)
- the Windows AD Domain name (like Contoso)
- the IP address of NPS server
- the RADIUS secret – the same password we defined in the NPS policy
- the source address of our device – this IP address must match the IP address we have already specified in the NPS policy
When you configure all those parameters, click on the button [ OK ] to save them. Now you can test your VPN connections.
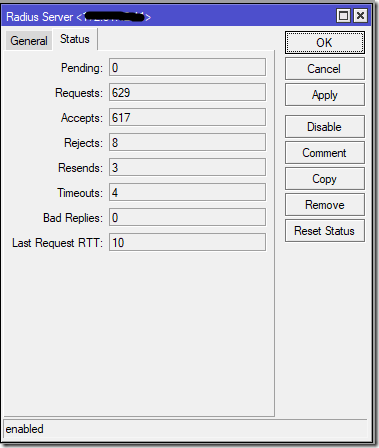
If you want to see the statistics, you can open this RADIUS connection and choose the tab named Status, where you can see the parameters of the communication.
You should see that most of your requests are accepted.
And the RADIUS server served well for many years
This was my story about this interesting integration. Again, there was a bit of magic that makes great things.
By the time you finish read this, my server will be upgraded to Windows Server 2016 and I used this same magic to transfer NPS on it. This service may finish more tasks but I used it only for this purpose.
As you can see, both sides are very flexible to configure. You may add more client devices or more servers, according to your needs. Even more, you can configure additional RADIUS servers for other Mikrotik network services, like hotspot.
Stay tuned.
Source : https://mivilisnet.wordpress.com/2018/10/01/how-to-integrate-your-mikrotik-router-with-windows-ad/